After completing the setup, the user is now able to access the mobile compliance portal. When the user is online, they will be able to choose the property they want to work with, select the unit addresses they need to review, look at open and closed compliance records, and add and process new compliance records. The user will be able to do almost everything using mobile compliance that they can do using the Compliance application in the system, except processing letters, which is completed using APPLICATIONS | Property Management Group | Compliance.
How to enter a new compliance record using Google Maps
1. Go to the compliance portal using the URL previously discussed and log in using the User ID and Password assigned to you in your VMS employee profile.
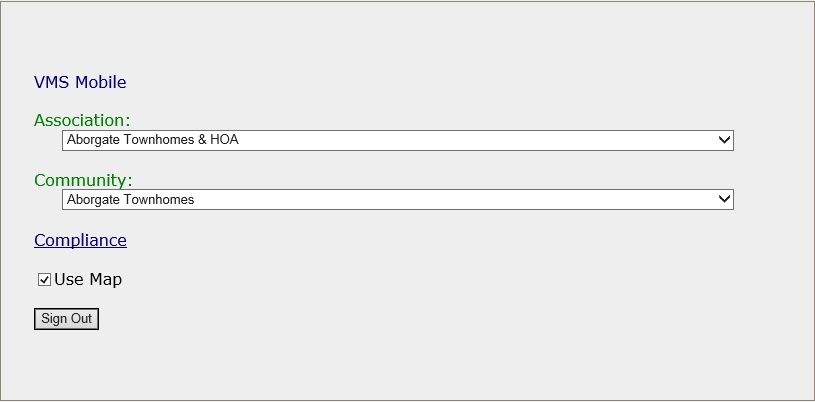
2. Select the Association.
3. Select the Community, if applicable.
4. Check the Use Map box to use Google Maps to display the property's addresses. If unchecked, the addresses will be displayed in a table format.
5. Click the Compliance link.
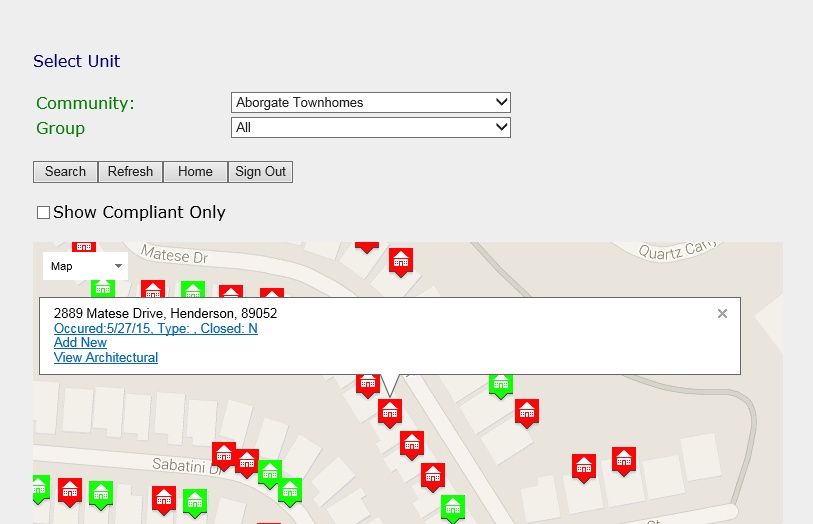
6. On the displayed page, select the unit by clicking on one of the house icons on the map.
a. The user can use the filter options to narrow down the search for the specific unit(s) needed.
i. Select from the Community menu to narrow down the addresses to the Community they are in.
ii. Select from the Group menu to narrow down the addresses to the Compliance Group they are in. The groups listed are based on the identifiers entered in the Inspection fields in Unit Maintenance. Entering data in the Inspection field allows the units to show up in groups based on which groups the user assigned them to.
b. The Red house icon identifies houses that have open compliance records.
c. The Green house icon identifies houses that do not have any open compliance records.
d. The Purple house icon identifies multi-unit complexes. Click the home to select the unit.
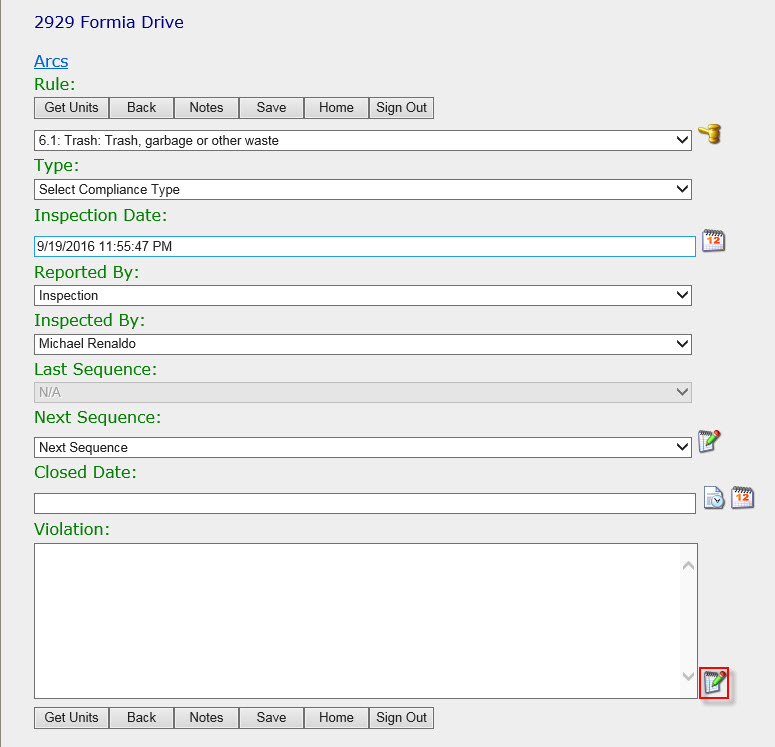
7. Select Add New. The Compliance Maintenance page is then displayed.
8. Select the Rule being violated
9. Select the Type related to the Rule, if applicable
10. Enter the Inspection Date and time
11. Select who the issue is being Reported By
12. Select the Employee who the issue was Inspected By
13. Select the Next Sequence to be processed
14. Enter the specific details of the Violation. If the selected rule has common entries defined, press the note tool ![]() next to the Violation box (noted in red box within image below), which will display the items selectable to fill in the violation text.
next to the Violation box (noted in red box within image below), which will display the items selectable to fill in the violation text.
15. Click on Notes to view or add a note to the compliance record. Note: Pictures are considered notes. Depending on the device used to access the website, the user can take direct pictures when accessing the note area.
16. Once all the selections are made, click the Save button.
17. The user can then go into VMS and process the compliance records by going to APPLICATIONS | Property Management Group | Compliance | Maintenance tab.
18. Select the Property.
19. Preview all entered compliance records.
20. Select the Post button ![]() in the Quick Access Toolbar.
in the Quick Access Toolbar.
How to enter a new compliance record using Unit Lists
1. Go to the compliance portal using the URL previously discussed and log in using the User ID and Password assigned to you in your VMS employee profile.
2. Select the Association.
3. Select the Community, if applicable.
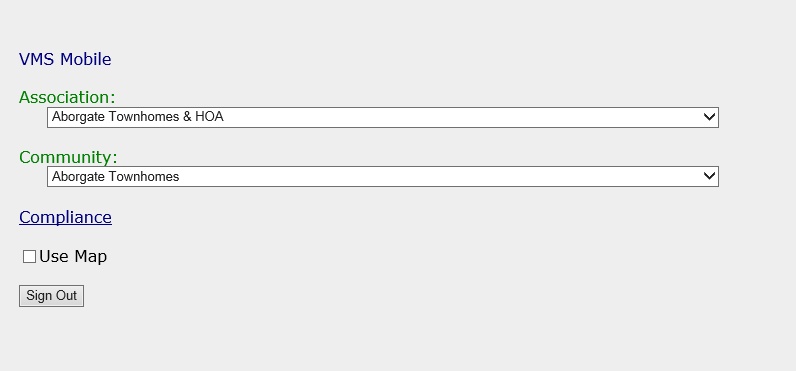
4. Uncheck the Use Map box to display the property addresses in a table format.
5. Click the Compliance link.
6. On the displayed page, select how the addresses are to Display on the site. The selection here will override the option previously setup in Setup | Property Setup | Compliance | Information.
a. The user can use the filter options to narrow down the search for the specific unit(s) needed.
i. Select from the Community menu to narrow down the addresses to the Community they are in.
ii. Select from the Group menu to narrow down the addresses to the Compliance Group they are in. The groups listed are based on the identifiers entered in the Inspection fields in Unit Maintenance. Entering data in the Inspection field allows the units to show up in groups based on which groups the user assigned them to.
iii. Check the Show Compliant Only box to only show addresses with no open compliance issues.
b. The Red addresses identify houses that have open compliance records.
c. The Blue addresses identify houses that do not have any open compliance records.
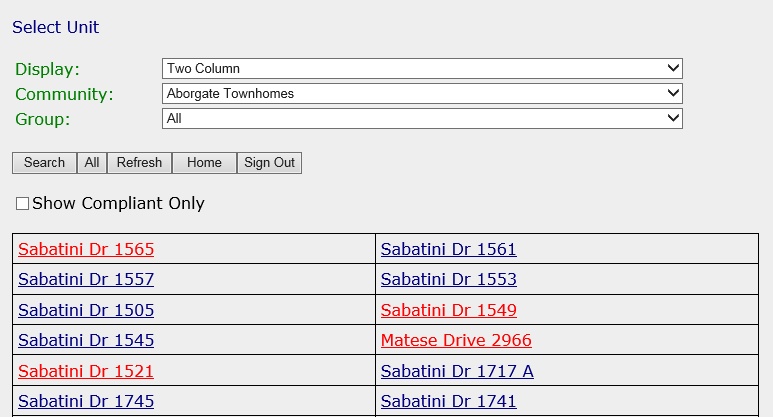
7. Select a unit. If no compliance exists, the Compliance Maintenance page is displayed. If compliance issues exist, the Compliance Selection page is displayed.
7. Select the Rule being violated
8. Select the Type related to the Rule, if applicable
9. Enter the Inspection Date and time
10. Select who the issue is being Reported By
11. Select the Employee who the issue was Inspected By
12. Select the Next Sequence to be processed
13. Enter the specific details of the Violation. If the selected rule has common entries defined, press the note tool ![]() next to the Violation box (noted in red box within image below), which will display the items selectable to fill in the violation text.
next to the Violation box (noted in red box within image below), which will display the items selectable to fill in the violation text.
14. Click on Notes to view or add a note to the compliance record. Note: Pictures are considered notes. Depending on the device used to access the website, the user can take direct pictures when accessing the note area.
15. Once all the selections are made, click the Save button.

16. The user can then go into VMS and process the compliance records by going to APPLICATIONS | Property Management Group | Compliance | Maintenance tab.
17. Select the Property.
18. Preview all entered compliance records.
19. Select the Post button ![]() in the Quick Access Toolbar.
in the Quick Access Toolbar.
Maintaining an open compliance, adding notes or pictures
It is common for a user to either close an existing compliance issue or move the issue to the next sequence during an inspection. The process of maintaining a current compliance is the same whether accessing the unit using the map or unit list.
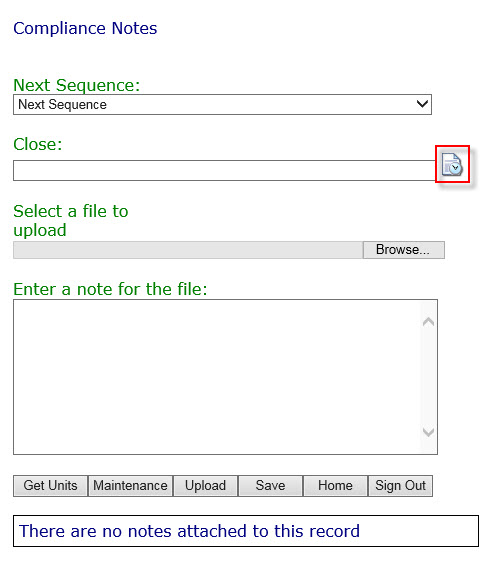
1. Once a unit is identified for follow-up, select the issue and the Compliance Note screen will be displayed.
2. The user can select the Next Sequence to move the compliance to (selecting Next Sequence from the list tells the system to automatically move the compliance to the next sequence from the last one processed) or close the compliance by entering the Close date or selecting the calendar tool ![]() (red box in image below) to use the current date.
(red box in image below) to use the current date.
3. The user can review any attached notes or add additional pictures by selecting a file to upload and enter a note about the picture in the Enter a note for the file field prior to pressing the Save button.
4. The user can then go into VMS and process the compliance records by going to APPLICATIONS | Property Management Group | Compliance | Maintenance tab.
5. Select the Property.
6. Preview all entered compliance records.
7. Select the Post button, ![]() , in the Quick Access Toolbar.
, in the Quick Access Toolbar.
