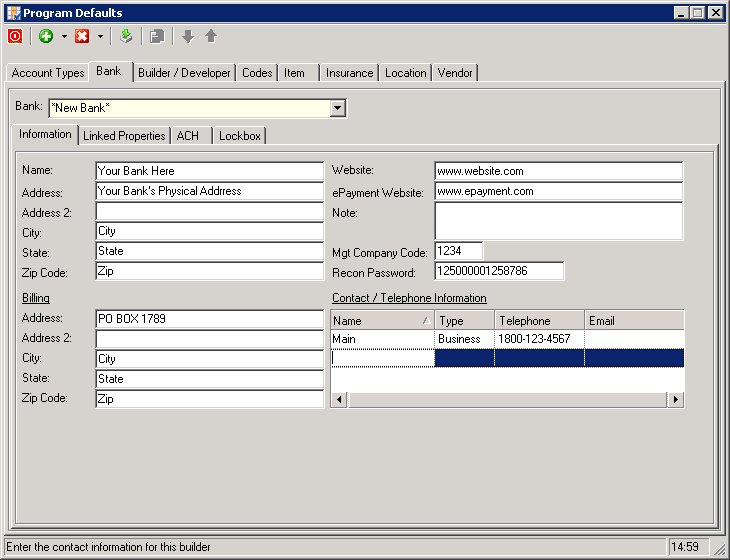
The Bank tab is used to input and maintain data pertaining to various banking relationships. The user may enter an unlimited number of banks.

The fields are further defined:
Field |
Description |
|---|---|
Name |
Enter the name of the bank. |
Address Info (Physical) |
Enter the physical address of the bank. |
Address Info (Billing) |
Enter the billing/mailing address of the bank. |
Website |
Enter the website address (URL) of the bank. |
ePayment Website |
If the bank defined has the capability to manage online payments of owner assessments you can enter the website address in this field and the VMS Web software will display a credit card icon on the e-Payment tab. When the icon is clicked the program will open a new Internet window with the defined website. |
Note |
Enter any notes pertaining to the bank. |
Mgt. Company Code |
Enter the unique Management Company Code provided by the bank to identify your property management company. |
Recon Password |
Enter the Auto-Reconciliation Password provided by the bank. This works in conjunction with VMSXChange. |
To add a bank:
| 1. | Click on the arrow next to the Add |
| 2. | Type in the name of the bank in the Name field. |
| 3. | Add the remaining information in the appropriate boxes. |
| 4. | Repeat step one to add another record. |
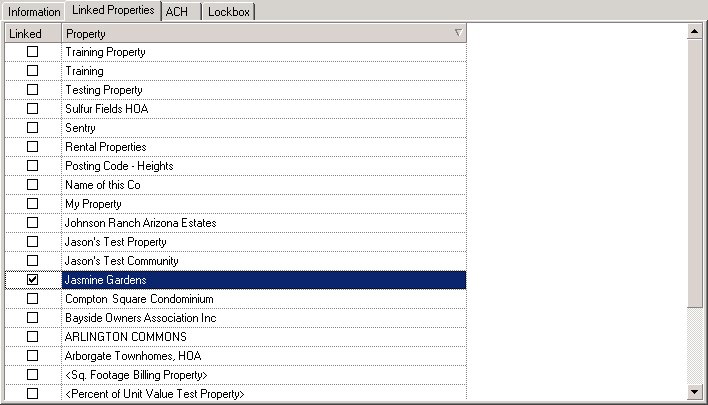
Linked Properties
Allows the user to link properties to the added bank. For increased efficiency, the user may link a bank to the *Master Template during the setup process.
|
All master list items, including banks, can also be linked though Property Setup. When you are located on a specific tab through Property Setup, such as Bank (Setup/Property Setup/Bank), you can right-click the mouse button and select Add Bank to display the master list of banks, which allows for the drag and drop of a selection to the property. |
