Bank Account Transfers
Bank transfers can be automatically processed electronically on the bank's system when cash to cash entries are posted through GL Batch, GL Entry and AP Maintenance.
The GL Batch and GL Entry screen behave the same way when processing a cash to cash journal entry, with the exception of the Batch screen, which can manage a batch of predefined memorized cash to cash entries that are processed at the same time. See the Batch and Memorized areas on how to manage batch processing, but use the following information to create the cash to cash account journal entry when memorizing the recurring transfer.
GL Entry
Follow the general directions for managing a journal entry, except you will select Credit (From) and Debit (To) GL Accounts to manage the transfer.
Example, the following steps illustrate transferring money between Operating (From) and Reserve (To) accounts.
1.The Journal Entry application is accessed through APPLICATIONS | General Ledger Group | Journal Entry.
2.Select the desired property.
3.Enter the Entry date and Set Posted Date (if applicable).
4.Check the Electronic Transfer checkbox (default, red box) to automatically manage the transfer.
5.Enter the Memo.
6.Select the Operating account (From), enter the desired Credit (purple box) amount to transfer our of the account.
7.Select the Journal Type (optional), enter a Note, select the Department.
8.Select the Reserve account (To), enter the desired Debit (blue box) amount to transfer out of the account.
9.Select the Journal Type (optional), enter a Note, select the Department.
10.Review the transaction and press the Post button ![]() .
.

The system will generate a Transfer Report to show the user the actual bank transfer about to be processed.

|
We strongly encourage you to review this report information before committing the transfer! |
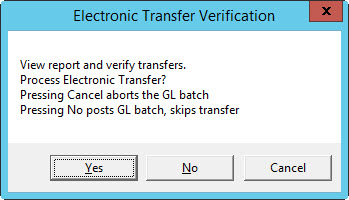
The system will prompt the user to verify the transfer about to be posted to the bank and the general ledger.
Selecting Yes will process the GL entry and transfer the funds, No will only post the GL entry and Cancel aborts the transaction.

Once the system has successfully processed the electronic transfer and posted the journal entry, another Transfer Report is created, but it will include the bank's returned batch number and the date when the transfer will be posted. The report is created as a PDF file and attached to the iXpert system. The reports can be accessed through iXpert by selecting the GL Adjustment research area.
AP Transfer
AP Maintenance can manage cash to cash transfers by selecting the Bank Account (From) and a GL Account as an expense (To), then posting the voucher.
Example, the following steps illustrate transferring money between Operating (From) and Reserve (To) accounts.
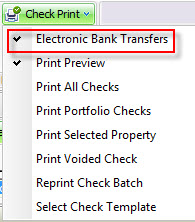
1.Before posting an bank transfer through AP, you must select Electronic Bank Transfer from the Check Print tool selection in the APPLICATIONS | Accounts Payable ribbon panel.

2.The AP Maintenance application is accessed through APPLICATIONS | Accounts Payable | Maintenance.
3.Select the desired property.
4.Select the Vendor.
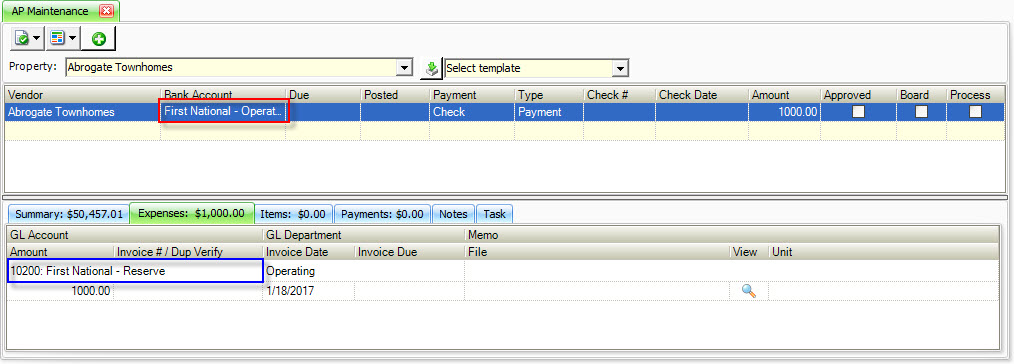
5.Select the Operating Bank Account to transfer (From, red box).
6.In the Expenses tab, select the GL Account bank account (To, blue box).
7.Select the Department, enter a Memo, enter the Amount and any other applicable fields.
8.Review the transaction and press the Post button ![]() .
.

Unlike posting electronic transfers through GL, the system will not create a Transfer Report prior to posting the AP voucher, however, once the transfer is successfully processed by the bank, a Transfer Report is created and it will include the bank's returned batch number and the date when the transfer will be posted. The report is created as a PDF file and attached to the iXpert system. The reports can be accessed through iXpert by selecting the GL Adjustment research area.