The Work Order application is used to create and track maintenance requests for property common areas or for an account/unit
The application can be accessed through APPLICATIONS | Property Management group | Work Order. In this area, you will be able to see all work orders for the selected property.
You can also review Work Orders that are linked to an account/unit by pulling up an account in APPLICATIONS | Account Maintenance | Account | select an account | Work Order tab. In this area, you will only see work orders related to the selected account.
Requirements
There are a couple items that should be defined first before using the Work Order application
1. Work Order Status: Customize WO status based on your needs
2. Work Order Type: Customize WO types based on the type of work orders you manage
3. AP Items: List of different types of work that can be performed for a work order. Mainly, you will pre-define items in a master list that can be linked to each property. Then at the property level, each item can be assigned to an expense code which allows a Work Order, or W/O, to become an AP voucher to be paid
Setting up Work Order Codes
The Work Order Status and Work Order Type fields can be defined by going to SETUP | Program Defaults | Codes tab | Program Area <select one of the below>.
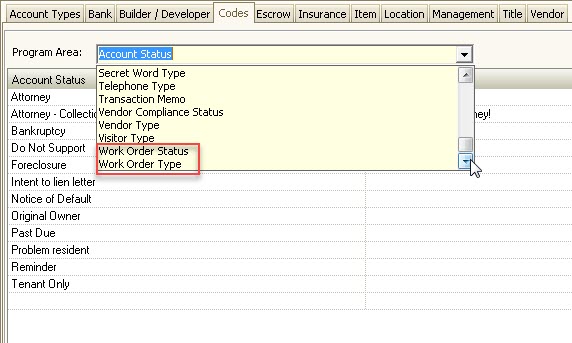
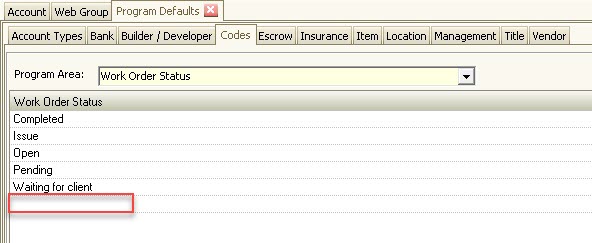
After selecting the Program Area, the user can then add a new code by selecting the last row on the list and type in the new entry.
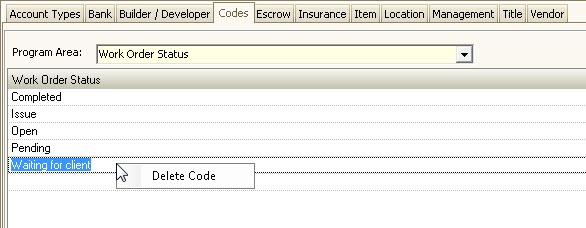
To delete a code that is no longer being used, simply right-click over it and select Delete Code.
Setting up AP Items
AP Items are defined in SETUP | Program Defaults | Item tab | A/P tab.
In this area, define the AP Items Master List of the different types of work that can be performed by filling in the following fields:
Field |
Description |
|---|---|
ID |
Generic name for the item. |
Description |
Descriptive name of the item. |
Category |
Customizable in SETUP | Program Defaults | Codes | Program Area: Item Category. |
Cost |
Optional. Enter the cost of the item. |
Taxable |
Optional. Select if item is taxable. VMS will not calculate taxes based on the field being selected. It is just for informational purposes. |
Add AP Items to the Property
The AP Items can now be linked to the property that will be using them.
There are two ways to add AP Items to a property.
1. Go to SETUP | Property Setup | Accounting tab | AP tab | Item tab.
oClick the arrow next to the Add icon, ![]() , and a menu will appear. Select Add Item from the menu.
, and a menu will appear. Select Add Item from the menu.
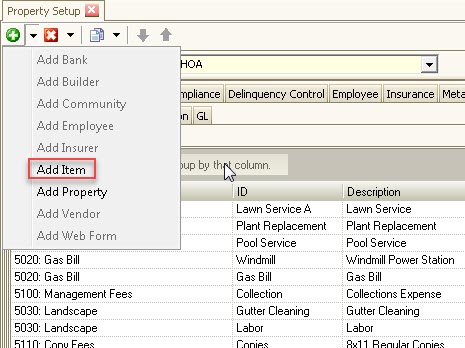
oRight-click in the item grid and select Add Item from the menu that appears.
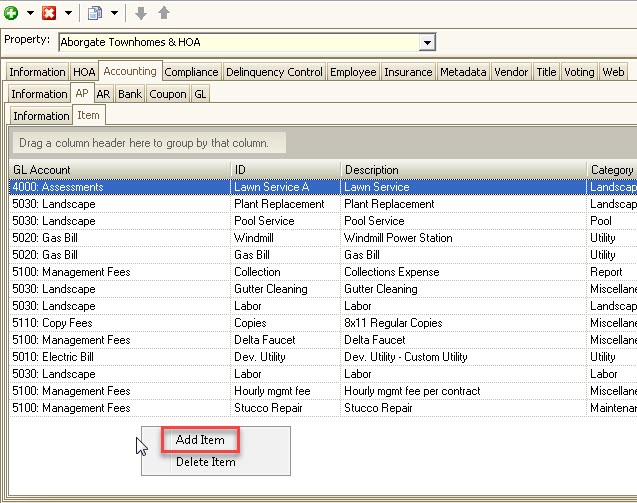
2. Another window will pop-up with a list of AP Items to choose from.
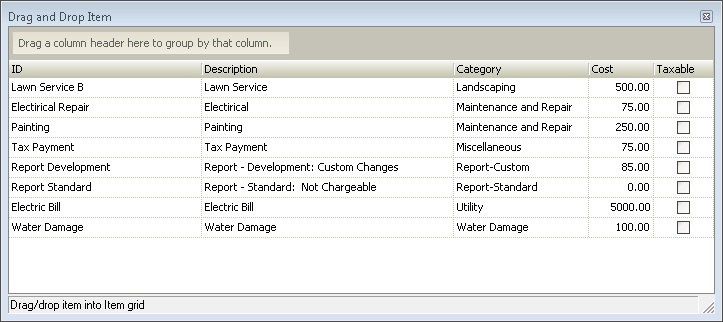
3. Select the item(s) to be added and then drag and drop the AP Item(s) into the grid.
4. When the AP Item is dropped into the grid, some of the fields need to be filled in.
oGL Account: Required. Select an expense account that can be linked to the item in case the WO is turned into an AP voucher.
oCost: Optional. Enter the cost of the item for this property. It will fill in the WO Cost field when adding a work order.
oShipping: Optional. Enter the cost of shipping. VMS will not calculate shipping. It is for informational purposes only.