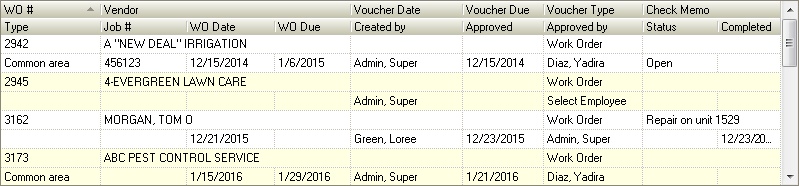
Unit based work orders are accessed through APPLICATIONS | Account Maintenance Group | Account | Work Order.
How to enter a work order:
1.Select an Account.
2.Select the Work Order tab.
3.Click the Add button, ![]() , to enter information for a new work order.
, to enter information for a new work order.
4.The WO # field will pre-populate with the next available number after the work order is created.
5.Select a Vendor.
6.Skip Voucher Date, Voucher Due, Voucher Type and Check Memo (all of them are used if moving a work order to AP).
7.Select a work order Type.
8.Enter a Job #, if needed.
9.Enter the WO Date, if needed.
10.Enter a WO Due date, if needed.
11.Select the employee this work order was Created By. This field will default to the user name currently logged into the system. This work order will show on the Created By users Task list until it's closed.
12.Enter the date this work order was Approved, if needed.
13.Select the employee that the work order was Approved By, if needed.
14.Select the current Status of the work order, if needed.
15.Enter the date the work order was Completed, if needed.
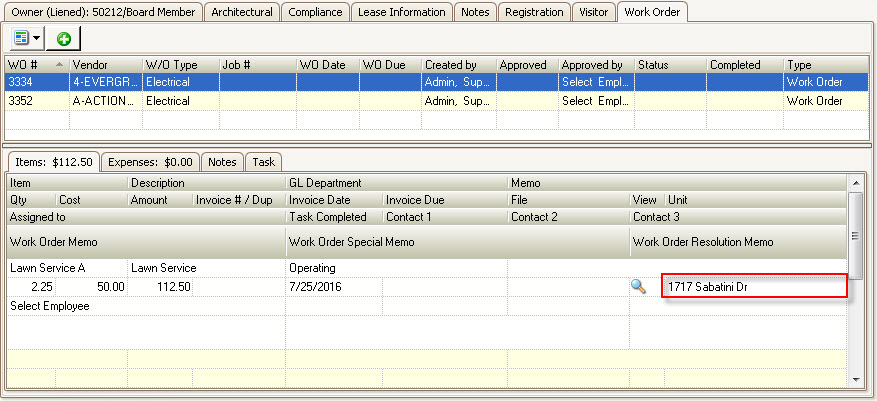
How to add items to a work order:
With the primary voucher data entered and the row selected, items must be added to the work order within the Items tab.
The Items tab is located at the bottom of the Work Order application.
1. Select the blank row in the Items grid
2. Click in the Item cell and press the dropdown button to show all available items
3. Select an Assigned to employee, which adds the item to the employee's task list
4. Enter the Work Order Memo, Work Order Special Memo, Contact 1, Contact 2 or Contact 3, if desired (The remaining fields are used when moving the voucher to AP)
5. Repeat process for additional maintenance items
When adding items, the system will automatically assign the unit address in the Unit field (red box). This makes the item a unit based work order.
|
Work orders can be both a common area and a unit based request. Items can be added to the work order with or without a Unit entered. Printing a blended work order causes a report to have a section for common area items and a section for any items linked to a Unit. Common area items will not show in the Account | Work Order application, as they are only available through the APPLICATIONS | Property Management Group | Work Order application. |