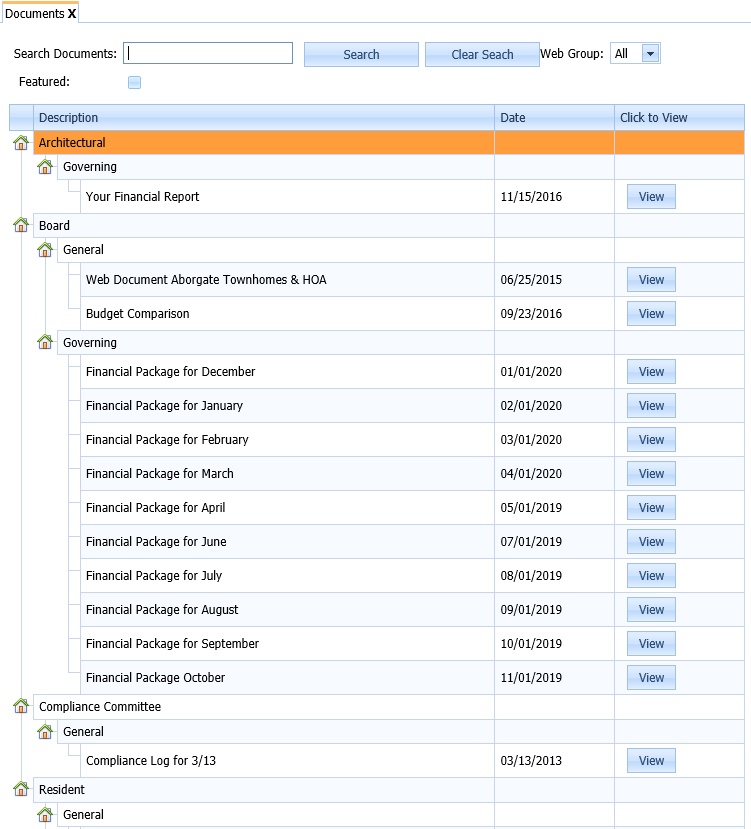
The Document application allows the user to add documents to the web portal for viewing by the different web groups. This feature is accessed through APPLICATIONS | Property Management Group | Document.
There are two types of web documents that can be added:
1.Vendor Document: Used to upload and give access to specific documents for a property and vendor. Example, you can post a landscape guidelines document for a vendor to review online for a property.
2.Web Document: Used to upload and give access to documents for a property's web group. Example, residents can view posted CCR guidelines and board members can view financial's.
Vendor Document

How to add a Vendor Document:
1. Select the Property to add a document to
2. Select the Vendor to add a document to
3. Select the blank row at the bottom of the grid
4. Select the Document Area to add the document into, drag/drop of browse for a document within the Document cell, enter a note to show the user the description of the document
The vendor can now log into the vendor portal and review the documents for the property.
How to delete a Vendor Document:
1. Select the Property to delete a document from
2. Select the Vendor to delete a document from
3. Right-click the document to delete, select Delete Document
Web Document
There are two filter drop-down selectors that allow you to filter the grid. The Group drop-down filters the list by Web Group and Document Area shows any documents within the web group by area assigned.
The entry fields are defined as follows:
Field |
Description |
|---|---|
Group |
Select the group that will be able to view the document. This is based on your Web Group setup. |
Added |
Field automatically defaults to today's date. |
Document Area |
Select the category that you would like the document to appear under. This allows the user to group the types of documents being attached. |
Featured |
Check this box to feature this item on the Home tab. |
Document |
Use the ellipses |
Note |
Enter a description of the document being attached. |
Order |
Enter the number order in which the documents are to appear under their Document Area. |
View |
Click the magnifying glass icon |
Email? |
Check the box to queue an email to be sent out by the system if the All Resident Notifications or Documents / News Notification queue task is defined. |

How to add a Website Document:
1. Select the Property to add a document to
2. Press the Add tool ![]() to display an available row at the top of the grid
to display an available row at the top of the grid
3. Select the Web Group, Added date, Document Area, Featured is shown on the website Home tab, drag/drop or browse for a note within the cell, enter a note to show the user the description of the document
4. Enter an order number, which sorts the order of the list of documents when displayed. The web site shows the documents by Web Group, Document Area, Order and Added date.
Once added, VMS Queue will send a resident notification (if the Document / News Notification queue task is defined) to owners electing to receive the notification and display the document on the portal.
How to delete a Document:
1. Select the Property to delete the document from
2. Right-click the document to delete, select Delete Document
Viewing Portal Documents
Within the portal, a user can access documents by selecting the Documents application.

The Documents application shows a user each assigned Web Group's documents and has searching features to filter the list by viewing a specific Web Group, Featured documents or entering keywords in the Search Documents entry box to locate a document within the list.

Pressing the View button will show the selected document.
