The VMSClientConnect portal is now setup for residents to access. To log in, a resident must know their account number or email address and the contact record password. The password is automatically assigned by the system and is randomly generated. Once in the portal, the user has access to applications and information previously defined in the system.
|
VMSClientConnect should be the primary communication tool for the management company to communicate with the residents. With the following features, the user can enhance the resident's involvement in the community. Real-time Information managed within VMS is displayed on the website that the owner can access at any time. |
Portal Dashboard
When a user initially logs into the portal, the standard dashboard is shown, which contains the Property Summary and Account View applications.
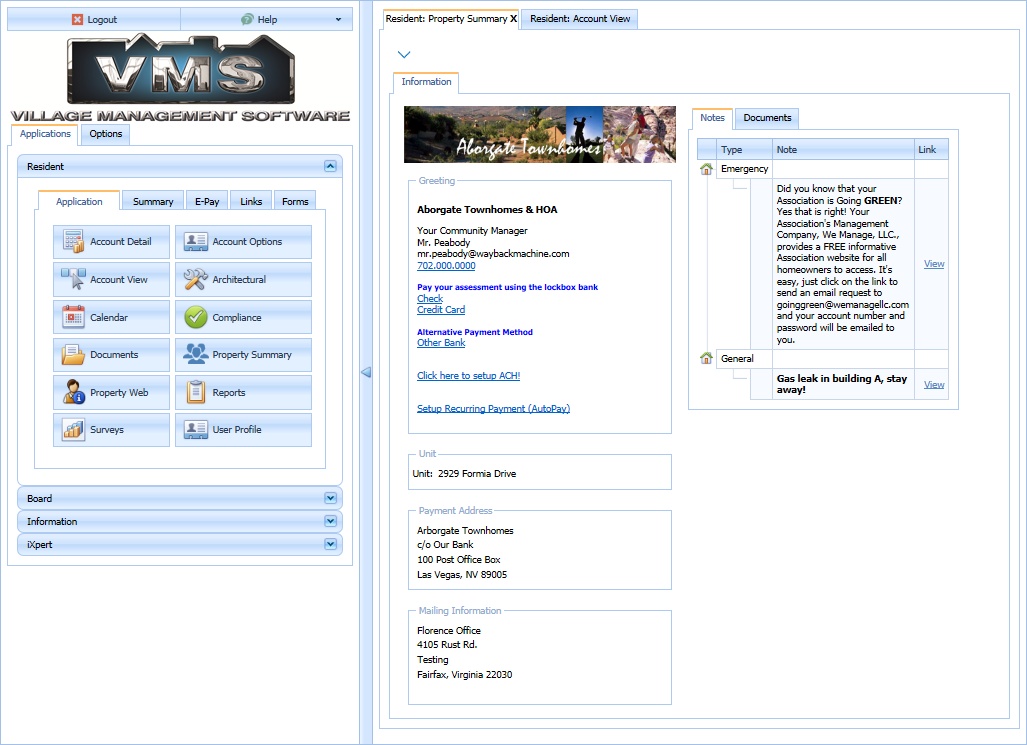
The dashboard has two regions, the User Panel located on the left and the Application section located to the right.
Based on the property settings and account attachment to Web Groups, the User Panel will give the user access to available applications to use within the User Panel section.
User Panel
The user panel is segmented by the Applications and Options tabs.
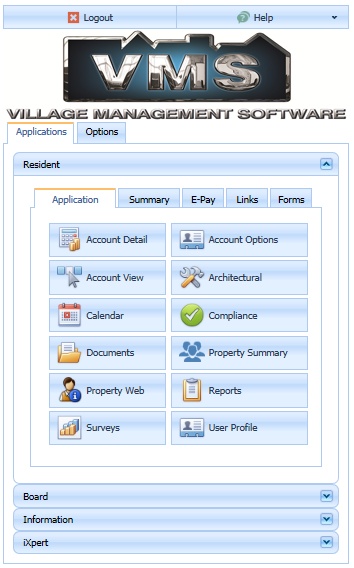
Options
Options allows the user to control the dashboard settings.
The following table defines the available options:
Item |
Description |
|---|---|
Auto Collapse |
This option controls the panel groups as they are selected. When collapsed, a panel will not show the available items within the group when another panel group is selected. Example the Resident group will shrink to just the Group header if the Information group header is selected, showing the contents of this panel. |
Close Tabs as Logout |
When selected, all tabs in the dashboard are closed when the user logs out of the portal. |
Theme |
The selected Theme for the portal. |
Applications
The Applications tab gives the user access to available Applications, Information, iXpert, and Web Group (Board in this example) sections.
As previously discussed, there are three primary Web Groups that must be created for each property before a user can log into the portal. Web Groups are used to give accounts, employees and committees access to property resources. Based on a web group's name, the portal will show a section based for the name given. As an example, if the Public web group is defined with the name Resident and the Governing Group is defined with the name Board, the portal will show each group by the name as shown here:
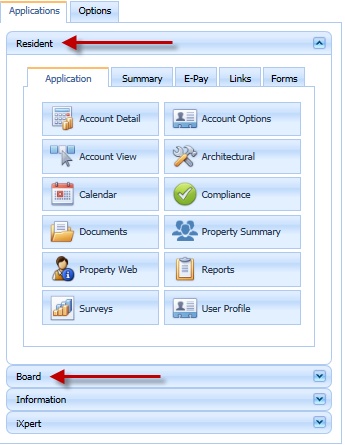
For the remainder of this discussion, it is assumed that the documentation will use the Web Group type to describe the contents of each section, not the name of the group. As a reminder, they are Public (Resident in our screen examples), Architectural, Compliance and Governing (Board in our screen examples).
The Public section of the User Panel has five tabs: Application, Summary, E-Pay, Links and Forms, which are available based on the access rights of the user.
Application
This area allows a user to access information specific to the logged in account.
In some cases, like the Calender, Documents and Reports within the Public section, the software will give a user access to common information for all web groups that the account is linked to within the same view. Example, if there are posted documents for Public and posted documents for the Governing, the application will show all available documents within the same screen.
The following table defines the available applications:
Applications |
Description |
|---|---|
Account Detail |
Shows the user all AR account detail, except voids. |
Account Options |
Allows the user to define coupon and welcome package options. |
Account View |
Combines the Account Detail, Architectural Compliance, Compliance and Notes into a single view. |
Architectural |
Shows all open architectural requests. |
Calendar |
Shows the Event Calendar. |
Compliance |
Shows all open compliance issues, allows user to respond to an issue if the Compliance Web Group form is attached to the property. |
Documents |
Shows all Web Documents related to the property and linked Web Groups. |
Property Summary |
This application uses the defined logo, information, property notes and featured documents posted to the property. |
Property Web |
If the web address is defined though Property Setup | Web, URL entry, a user can show the defined website within the portal. |
Reports |
Allows the user to generate reports from Report Groups defined for each associated Web Group the account is linked to. |
Surveys |
Shows any Surveys available for the property. Surveys can be entered by Board leaders or the employees. When a survey is setup, the user can make their selections and submit their vote. |
User Profile |
The area allows a user to access contact information, email options and password information. |
Summary
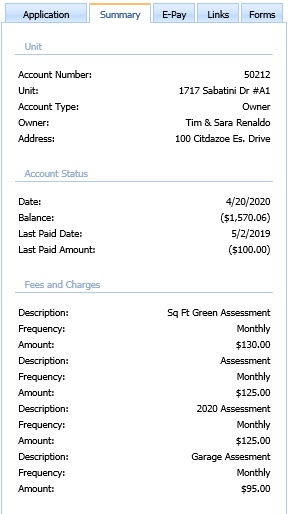
The summary section displays information about the account, unit, billing payment and property information.
E-Pay
The E-Pay section displays bank / merchant payment buttons used by the resident to pay assessments through the vendors payment portal.
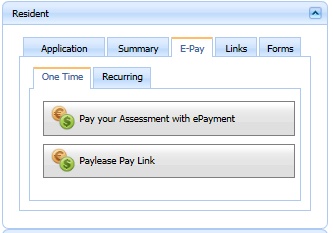
Buttons are added to this list based on three definitions:
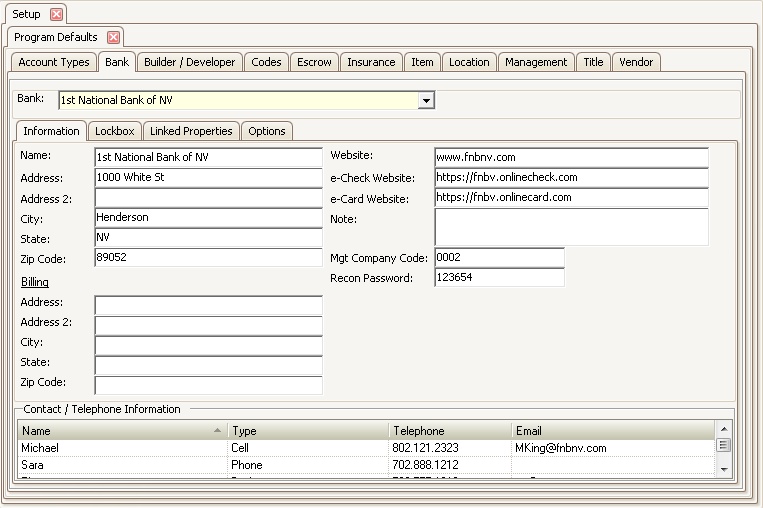
1.Through SETUP | Program Defaults | Bank, a bank record can have an eCheck and/or eCard payment portal website address defined. A button will show for the bank if it is linked to a property payment posting code, defined for lockbox or the bank is linked to a property.
2.Through SETUP | Property Setup | Web | URL Links you can define a vendor's web address with at least one Token and VMSClientConnect will add the button.
|
This is an advanced configuration. Request help from support if you have any questions on how to use this feature. |

3.An advanced feature, through SETUP | Property Setup | Web, the Information box can contain HTML hyperlink (a tag) references allowing the web user to click a link to launch an external web page. The hyperlink can contain Tokens to include resident data for the external page, which VMSClientConnect will determine to be a payment portal.
Here is an example of HTML markup with an <a> tag linking to a fictitious bank portal with passed merge tokens:
<a target='_blank' href='https://bankpaymentportal.com?managementCouponId=[Management_Company_ID]&associationCouponId=[Association_ID]&propertyCouponId=[Association_Account_Number]&first=[First_Name]&last=[Last_Name]&email=[Email]&phonenum=[Telephone]&line1=[Property_Address]&city=[Property_City]&state=[Property_State]&postalCode=[Property_Zip]&amount=[AccountBalance]'>Bank Payment Portal</a>
|
This is an advanced configuration. Request help from support if you have any questions on how to use this feature. |
Links
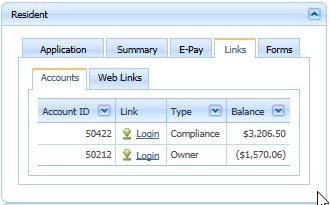
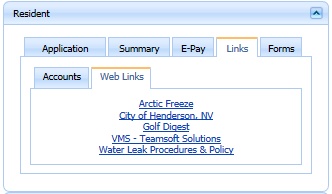
The Links tab has two features. The Accounts tab allows a user to automatically log into any additional accounts (example sub-accounts) and the Web Links tab shows any links defined through SETUP | Property Setup | Web | URL Links.
Forms
The Forms tab shows any web forms linked to a property through SETUP | Property Setup | Web | Web Forms.
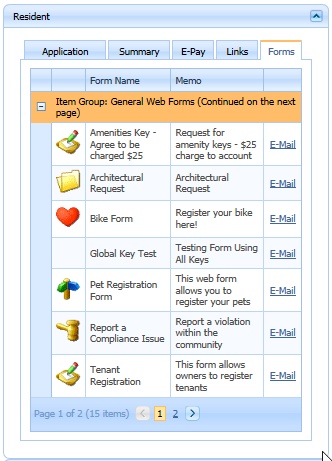
The user selects the form using the E-Mail link, which displays the form and allows the user to send it.