VENDOR tab
The Vendor setup is accessed through SETUP | Configuration Group | Program Defaults | Vendor.
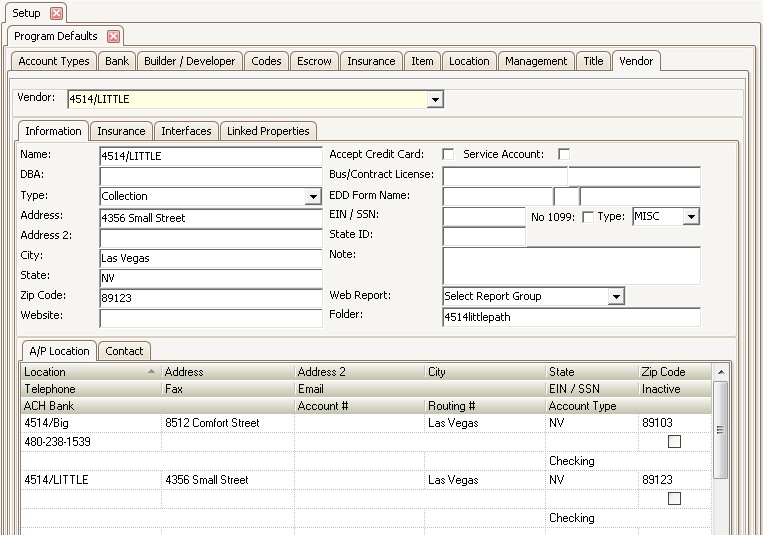
This area is used to setup and link vendors to specific properties. The vendors setup here will be accessible in AP.
To add a vendor:
1. In the Home tab, click the ![]() button.
button.
2. When a new record opens called *New Vendor*, enter the Vendor's:
a. Name of vendor
b. DBA, if applicable
c. Select the vendor Type, if applicable
d. Address, Address 2, if applicable, City, State, and Zip Code
e. EIN/SSN, if applicable
f. Select No 1099, if the vendor does not need to receive a 1099
g. Select Type for the type of 1099 form the vendor needs to receive
3. Click in any field in the A/P Location tab. Then in the Home tab, click the ![]() button. This will copy all the information in the top half of the Information tab into the A/P Location tab in the lower half of the window. This contact information will be viewable in the Accounts Payable application.
button. This will copy all the information in the top half of the Information tab into the A/P Location tab in the lower half of the window. This contact information will be viewable in the Accounts Payable application.
|
Each vendor must have at least one location entered in the VMS system in order for them to be displayed in the AP maintenance module. Information located in this section will be used when printing AP checks for a vendor. |
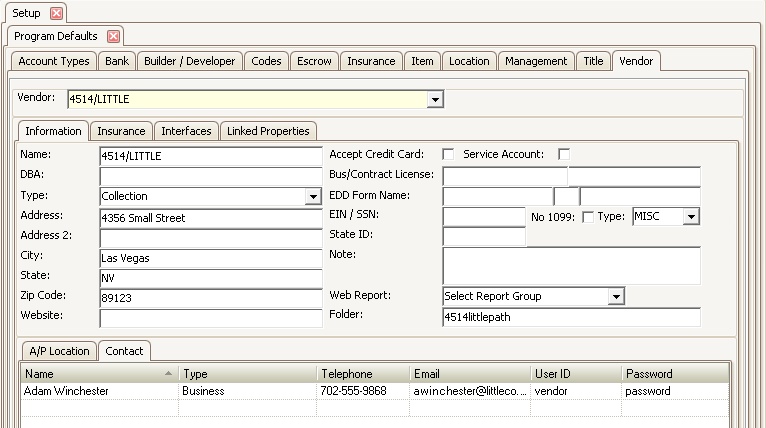
VENDOR CONTACT Tab
The Vendor Contact tab allows the user to enter information about a specific contact person that works for the vendor. This is also where the user can assign a user ID and password to give the vendor access to the vendor web portal and real-time data access through the VMSXChange web service.
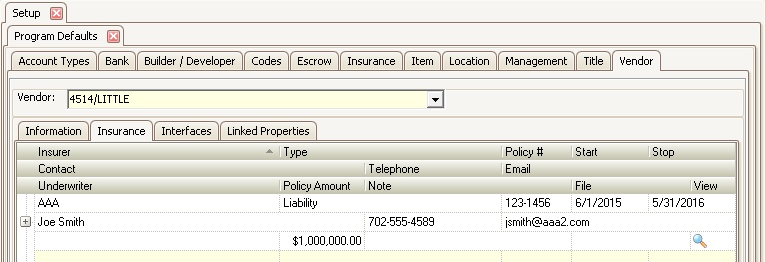
INSURANCE Tab
The user is able to keep track of the vendor's insurance information within the Insurance tab. Any information the user receives from the vendor regarding their insurance can be entered here. If a date is entered in the Stop field, the user that enters vouchers in the Accounts Payable application will see a message pop-up when they select a vendor whose insurance is close to expiring. Expiring insurance is also used in the Task Management feature.
INTERFACES Tab
The Interfaces tab is where the user allows the vendor to have access to certain information online. This is mostly used for collection vendors like attorneys or collection agencies.
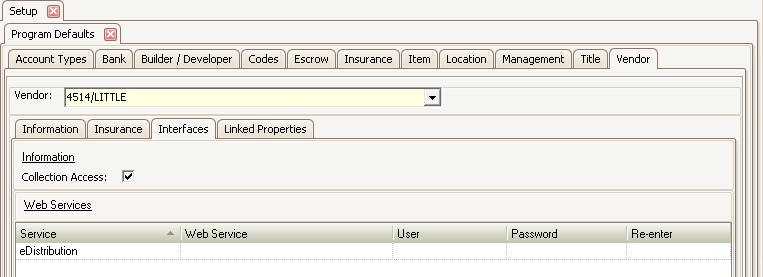
When the user checks the Collection Access box, this will give the vendor online access to see any delinquent owner accounts. The vendor must use the user ID and password assigned by the management company that was previously setup in the Contact tab to access the vendor web portal.
The Web Services area allows the user to setup further integration specifications with certain vendors. An eDistribution vendor can automatically receive a VMS created document (compliance and delinquency) and send it 1st Class or certified mail to avoid in-house printing. The user will select eDistribution from the Service field and enter a Web Service URL that is provided either by the vendor or by VMS Support. A User name and Password (and Re-enter), which is usually provided by the vendor, is then entered into the system.
LINKED PROPERTIES Tab
The Linked Properties tab is used to link the vendors to the specific properties that use them.
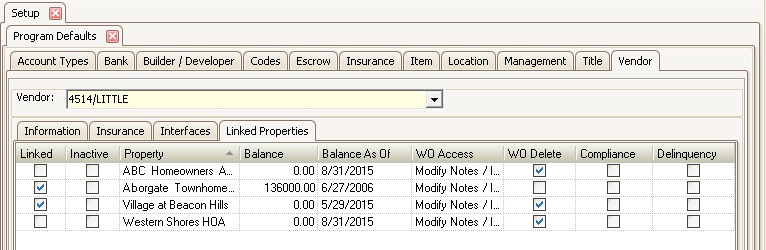
The fields are defined as follows:
Field |
Description |
|---|---|
Linked |
Check the box to link the vendor to the property |
Inactive |
Check the box to inactivate the vendor for the property. The vendor can be inactivated only when they have had no transactions posted to their record. |
Balance |
If transitioning to VMS during an accounting period, enter the amount that the vendor has been paid in the prior system. When printing 1099's for the year, the system will add the Balance entered to any new vouchers paid to the vendor through VMS. |
Balance As Of |
If transitioning to VMS during an accounting period, select the date that the beginning balance was entered. This date determines when to add the Balance entered to any vouchers paid to the vendor when printing 1099's. |
WO Access |
This setting allows the vendor work order access on the vendor web portal.
No Access: The vendor does not have access to work orders Read Only: The vendor is only able to view work order information that has been previously entered Modify Notes: The vendor is able to modify notes regarding the work orders Modify Notes/Items: The vendor is able to modify notes and items regarding the work orders
|
WO Delete |
Check this box to allow the vendor to delete work order data |
Compliance |
Check this box if the vendor has access to the property compliance information through the vendor portal |
Delinquency |
Check this box if the vendor has access to the property delinquency information through the vendor portal |