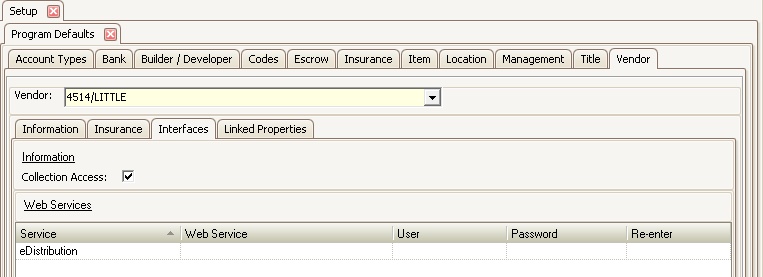
The Interfaces tab is where the user allows the vendor to have access to certain information online. This feature can be used by collection vendors like attorneys or collection agencies, and print-house vendors.

Information area
•Place a check mark in Delinquency Access for those vendors that are allowed to have access to delinquent owner accounts online.
•This is normally granted to Attorneys or Collection Agencies.
•By defining a vendor with Delinquency Access, the vendor can be selected as a Collection Vendor per each delinquency sequence of a property in SETUP | Property Setup | <select property> | Delinquency Control tab.
•In order for the vendor to be able to login:
oVendor must use the User ID and Password that has been setup in the Vendor Contact tab.
oEvery property that is linked to the Vendor must have a Manager web group defined.
Web Services area
The Web Services area allows the user to setup further integration specifications with certain vendors. For example:
•eDistribution Vendor: Vendor that can automatically receive VMS generated letters (compliance or delinquency), send them via 1st class or certified mail, this to avoid printing the letters in-house.
•ePayment Vendor: Vendor that can automatically receive information to pay invoices to other vendors via electronic payment, which normally is a direct deposit to their bank account.
Add a Web Service (Interface):
1. Select the eVendor name from the Service drop down list. This list is hard-coded in VMS. If the Vendor is not listed, it means that another vendor record is setup in VMS to use this service. VMS does not allow more than one vendor using the same web service name.
2. Enter the Web Service url, that should have been provided by the eVendor.
3. Enter the User and Password (and Re-enter) provided by the eVendor.